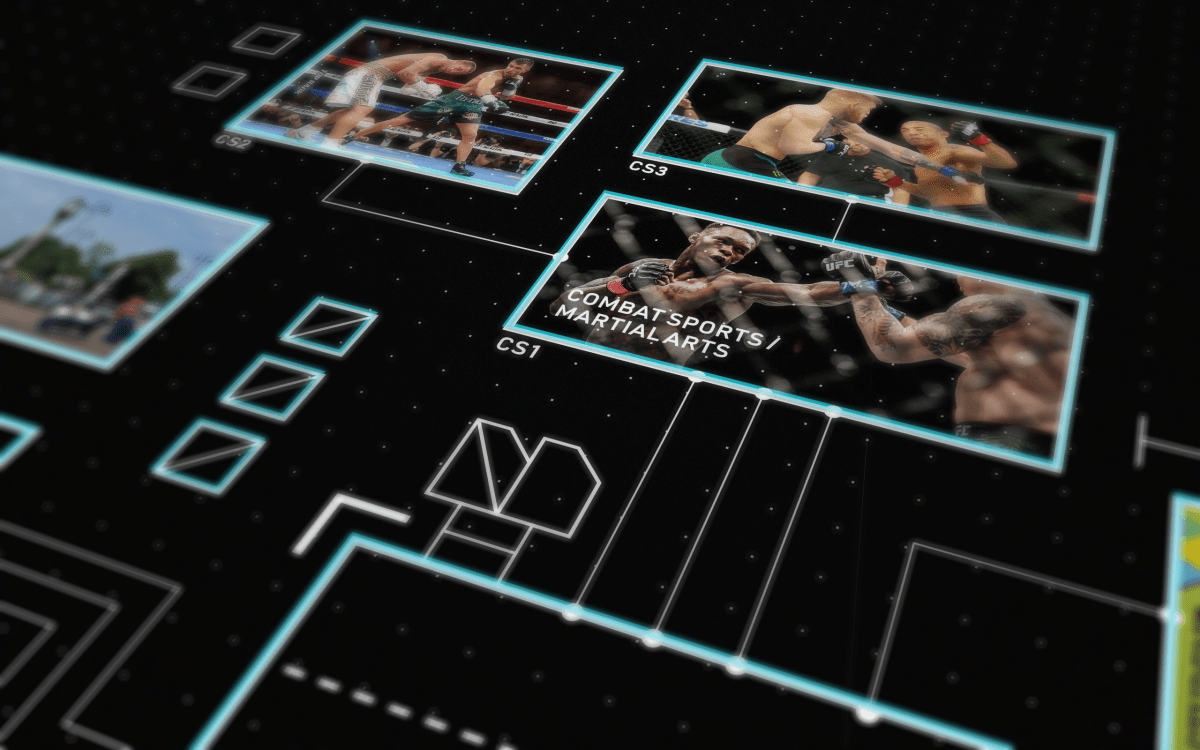
For the Photoshop montage, I thought that my interests would be quite boring. I really only have one, maybe two interests outside of graphic design so to just make that into a montage would be a bit mundane. So I decided to try make the presentation interesting. I sketched out some schematic ideas based off of motherboard schematics and some UI interfaces on Behance. After that I took the better ideas from the sketches and created a schematic in Illustrator. Then I took them into Cinema4D to give camera angles and depth, then manipulated the images I saved for the montage into the renders, created some lighting and depth and created a final composition out of the five renders.
I started by sketching out some ideas for a motherboard-like schematic. I played around with ideas and tried out a lot more abstract sci-fi UI-type of schematics, I had loose wires connected like in a game engine blueprint. I ended up using more of a classic motherboard design with a central processing unit at the core of it, and added a few elements of a sci-fi UI design.
Then I started to play around with the perspective, because I didn’t want to just have a flat birds-eye view of the schematic for the montage. I wanted to capture nice angles and depth and bring it all together in a final composition with the schematic as the centre-piece.

After I had finished sketching and had a good idea of what I wanted to do, I started creating the schematic in Adobe Illustrator CC. I toggled the grid on, enabled ‘Snap to grid’ and mapped out the images I wanted to use in the schematic by making the containers roughly the same aspect ratio as the images I had saved. Since I was snapping to the grid, I had to do a little bit of cropping in Photoshop later on.
Then I wanted to export it into Cinema4D to create interesting camera angles and try to add elements of depth. Adobe Illustrator doesn’t directly export to Cinema4D too well, I had to Expand all my paths and type so that they were completed paths so Cinema4D wouldn’t recognize the containers as just big rectangles, as opposed to containers for the images later on. Then I had to export the AI in AI8, as Cinema4D doesn’t read AI CC files. Then I used a Cinema4D plug-in called ‘CV-ArtSmart’ to import the AI8 file without any errors.

In Cinema4D, I extruded all the paths to about 0.2mm in width. Then I duplicated all the containers, raised them slightly above the rest of the schematic and used a blue material on them. I did the same thing with the ‘DAR’ but in orange as I wanted to portrait that this was the core. I took a very small cube and used a cloner to replicate the grid, I thought a lined grid would look too visually noisy so I opted for a dotted grid, and moved it slightly lower than the schematic to create some depth that I thought would be interesting at the close-up angles. In hindsight I think I should have opted for a depth of field effect in my renders, because it ends up just looking like the grid is off, instead of below the schematic and I couldn’t really fix this in Photoshop.
These are the raw renders from Cinema4D, which I then added colour correction, lens blur to try to create more depth of field and noise texture. Then I manipulated these images into the schematics.
These images are of my town, the town I was born in, my Student ID, combat sport photos, a construction of the Apple logo using the golden ratio, a logo I created for a hot air balloon psuedo-company also using the golden ratio. A moon wordmark I made for eclipse. A drinks brand-identity which I created and a computer with Photoshop loading on it.
Here are each of the individual renders after being manipulated and altered in Photoshop.

And here is the final composition which I composed in Photoshop. My inital plan was to layer them together on different levels, but found this to be very hard to manipulate without looking like a mess and very difficult to get the exact camera angles for each one of the images in Cinema4D. So instead I went for this style of composition. If I had a little more foresight and sketched out the final composition, I would have angled the cameras of the images to better favour this composition. I mostly did the camera angles on an indivdual basis to look at as individual images as they took a while to complete each one. I also would have worked out the dimensions to get better aspect ratios for the images so that they would fill the entire 2000 x 1200px canvas.
Instead I tried to compose the images in order of camera angle, with the birds-eye schematic as the centre-piece, with a desaturated large scale of the schematic as the background. I also tried to create lighting that would give an idea of depth to lay out the 6 images, as opposed to just being 6 pieces lined up together.


